HOW TO MAKE A BOOTABLE USB ON CMD
How to make a bootable usb on Cmd
#So, Let’s Make A Bootable Flash Drive By CMD
- Prepare Your Environment:
- Ensure your computer is running on the Windows operating system.
- Have your Windows setup files readily available on your computer for bootable transformation.
- Launch CMD Command Prompt:
- Open CMD Command Prompt as an administrator to bypass security restrictions.
- You can access CMD Command Prompt through various methods, such as the Start menu search or using the “Run” dialog box.
- 20 Different Ways To Open CMD On Your Computer

- Access Disk Management Utility:
- Input the command “diskpart” in the CMD window and press Enter to enter the Disk Management Utility.
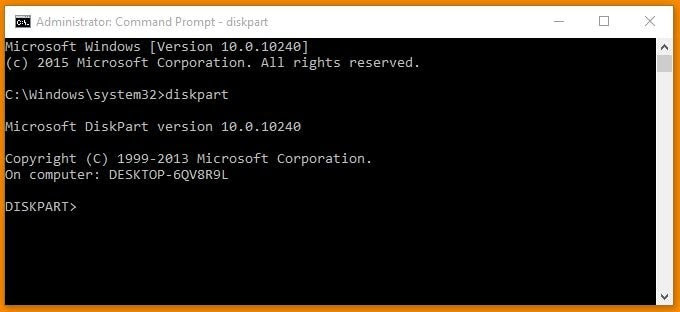
- Input the command “diskpart” in the CMD window and press Enter to enter the Disk Management Utility.
- Identify and Select Your Pendrive:
- Type “list disk” to display all connected disks and identify your Pendrive’s disk number.
- Enter “select disk #” (# represents your Pendrive’s disk number) to choose your Pendrive and mark it as active for bootable adjustments.

- Execute Essential Commands one by one:
- “clean” to wipe the Pendrive clean.
- “create partition primary” to create a primary partition on the Pendrive.
- “select partition 1” to select the created partition.
- “active” to mark the selected partition as active.
- “format fs=ntfs quick” to format the partition with the NTFS file system quickly.
- “assign” to assign a drive letter to the Pendrive.
- “exit” to exit the Disk Management Utility.

- Complete the Process:
- Once these commands are executed successfully, the CMD process is complete.
- Proceed with any additional steps necessary for your specific bootable requirements, such as copying boot files onto the flash drive.
Now that your pendrive is fully bootable, the last step is to transfer your Windows Setup files onto it. You’ve got a few options to do this smoothly:
- Transfer from Computer’s Drive to USB: If you’ve got all the Windows setup files stored on your computer’s drive, simply copy and paste them onto the flash drive. This method makes for a straightforward transfer straight from your local storage to the USB device.

- Transfer from Windows Installation Disc to USB Pendrive: Use your Windows installation disc to transfer the setup files to the flash drive. Pop the installation disc into your computer’s optical drive and copy the necessary files onto the flash drive. This method is perfect for folks with a physical copy of the Windows installation disc.

- Transfer from ISO Disk Image to USB Pendrive: Alternatively, if you have an ISO disk image of your bootable Windows setup, you can extract the files directly onto the flash drive. Mount the ISO image using virtual drive software or extract its contents using extraction tools, then copy the extracted files onto the flash drive. This approach is handy for those with a digital copy of the Windows setup in ISO format.

By picking one of these three options, you can efficiently transfer the required Windows Setup files onto your flash drive, completing the bootable transformation process. Whether you go with files from your computer, a Windows installation disc, or an ISO disk image, the result is the same: a fully functional bootable Pendrive ready for use in system installations or repairs.
#A Useful Tip
This step is critical: make sure you double-check to ensure you’re transferring only the essential Windows files and not just pasting the entire setup folder. If you simply copy the setup folder onto your Pendrive, it won’t boot up when you need it to. So, be diligent in selecting and transferring only the necessary Windows files to ensure successful booting from your Pendrive when necessary.


Comments
Post a Comment